瞭解如何檢查PA2S和PA3尋呼網關的IP地址、收聽IP公告、在DHCP和靜態IP模式之間切換,以及使用IP掃描儀查找同一本地網絡上的設備。
本指南說明裝置的預設 IP 行為、如何識別其目前的 IP 位址,以及如何在動態 IP 與靜態 IP 模式之間切換。
PA2S 和 PA3。
將 PC 與 PA2S 或 PA3 連接到同一個區域網路(LAN)中。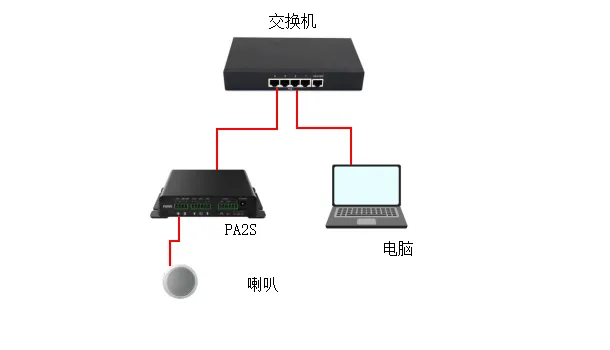
PA2S 和 PA3 出廠時預設使用 DHCP。
2.1.1 當 PA2S 或 PA3 連接到可自動分配 IP 位址的網路環境時:
方法 1:在待機狀態下(開機 30 秒後),長按音量減小鍵 3 秒,裝置會直接播報 IP 位址。
方法 2:在待機狀態下(開機 30 秒後),長按速撥鍵直到聽到提示音後鬆開,再快速按一次該按鍵,稍候裝置即會播報 IP 位址。
2.1.2 當 PA2S 或 PA3 處於無法自動取得 IP 位址的網路環境時,請將裝置切換至靜態 IP 模式:
方法 1:在待機狀態下(開機 30 秒後),長按音量增大鍵直到聽到提示音(快速蜂鳴聲)後立即鬆開,再快速連按音量增大鍵三次。
方法 2:長按速撥鍵直到聽到提示音(快速蜂鳴聲)後立即鬆開,再快速連按該按鍵三次。
任一方法都可將裝置切換至靜態 IP 模式。預設靜態 IP 位址為 192.168.1.128。
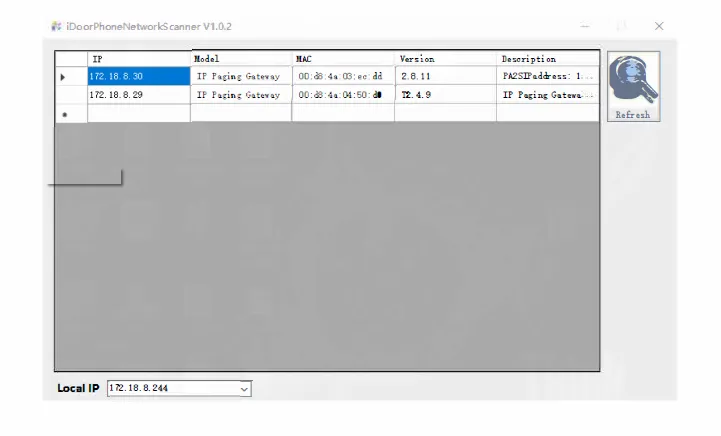
請確認 PC 與 PA2S 或 PA3 位於同一個 LAN 中。可透過以下連結下載 PC 端的 IP 掃描工具:
https://www.fanvil.com.cn/Uploads/Marketing/Tool/IPScanner_v1.2.1.zip
開啟掃描工具後,點擊 Refresh 以偵測裝置的 IP 位址。